Estimated Time: 10-15 minutesUse the integrated SQL editor to explore your ingested data and validate that everything was imported correctly.
Accessing the IDE
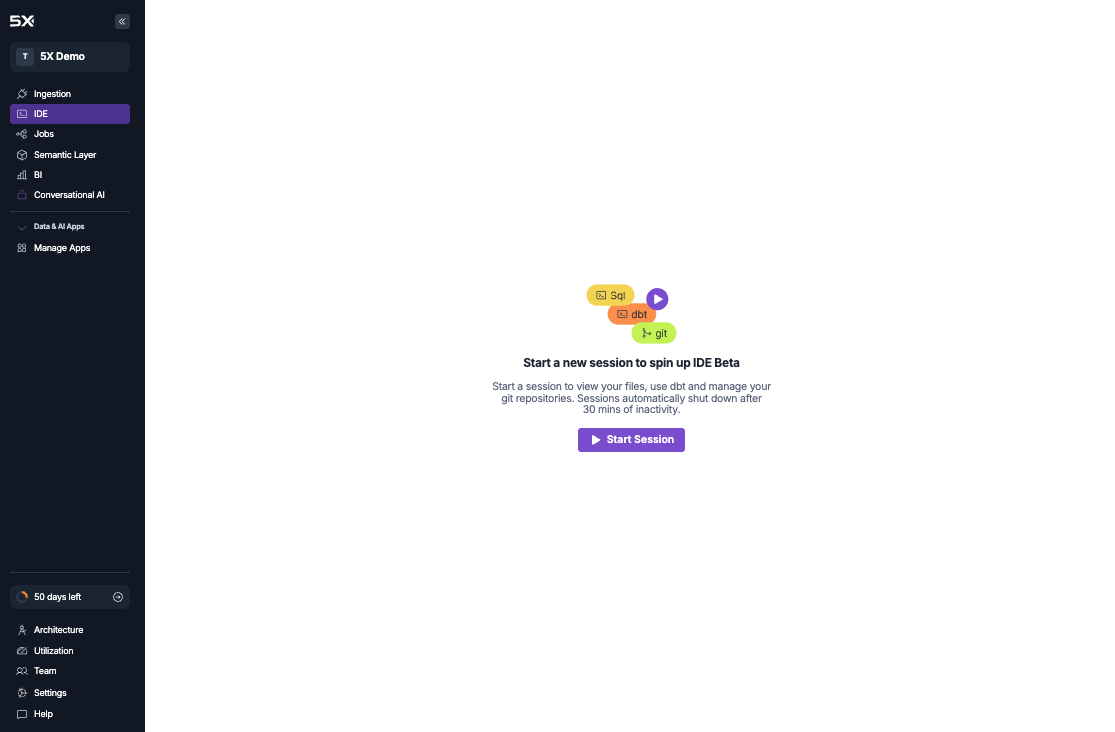
Now that your data has been ingested, it’s time to explore it using the 5X platform’s modern VS Code-based IDE:- Navigate to IDE
- Click IDE in the left sidebar of your workspace
- Click “Start Session” to initialize your development environment
- Wait approximately 30 seconds for the environment to fully load
For existing warehouse users: If you connected your own existing warehouse (Snowflake, BigQuery, AWS Redshift, or PostgreSQL) instead of using the 5X managed option, you’ll need to configure your IDE credentials in Settings → IDE → Credentials before you can query your data. The IDE will guide you through this setup process.
Exploring your data
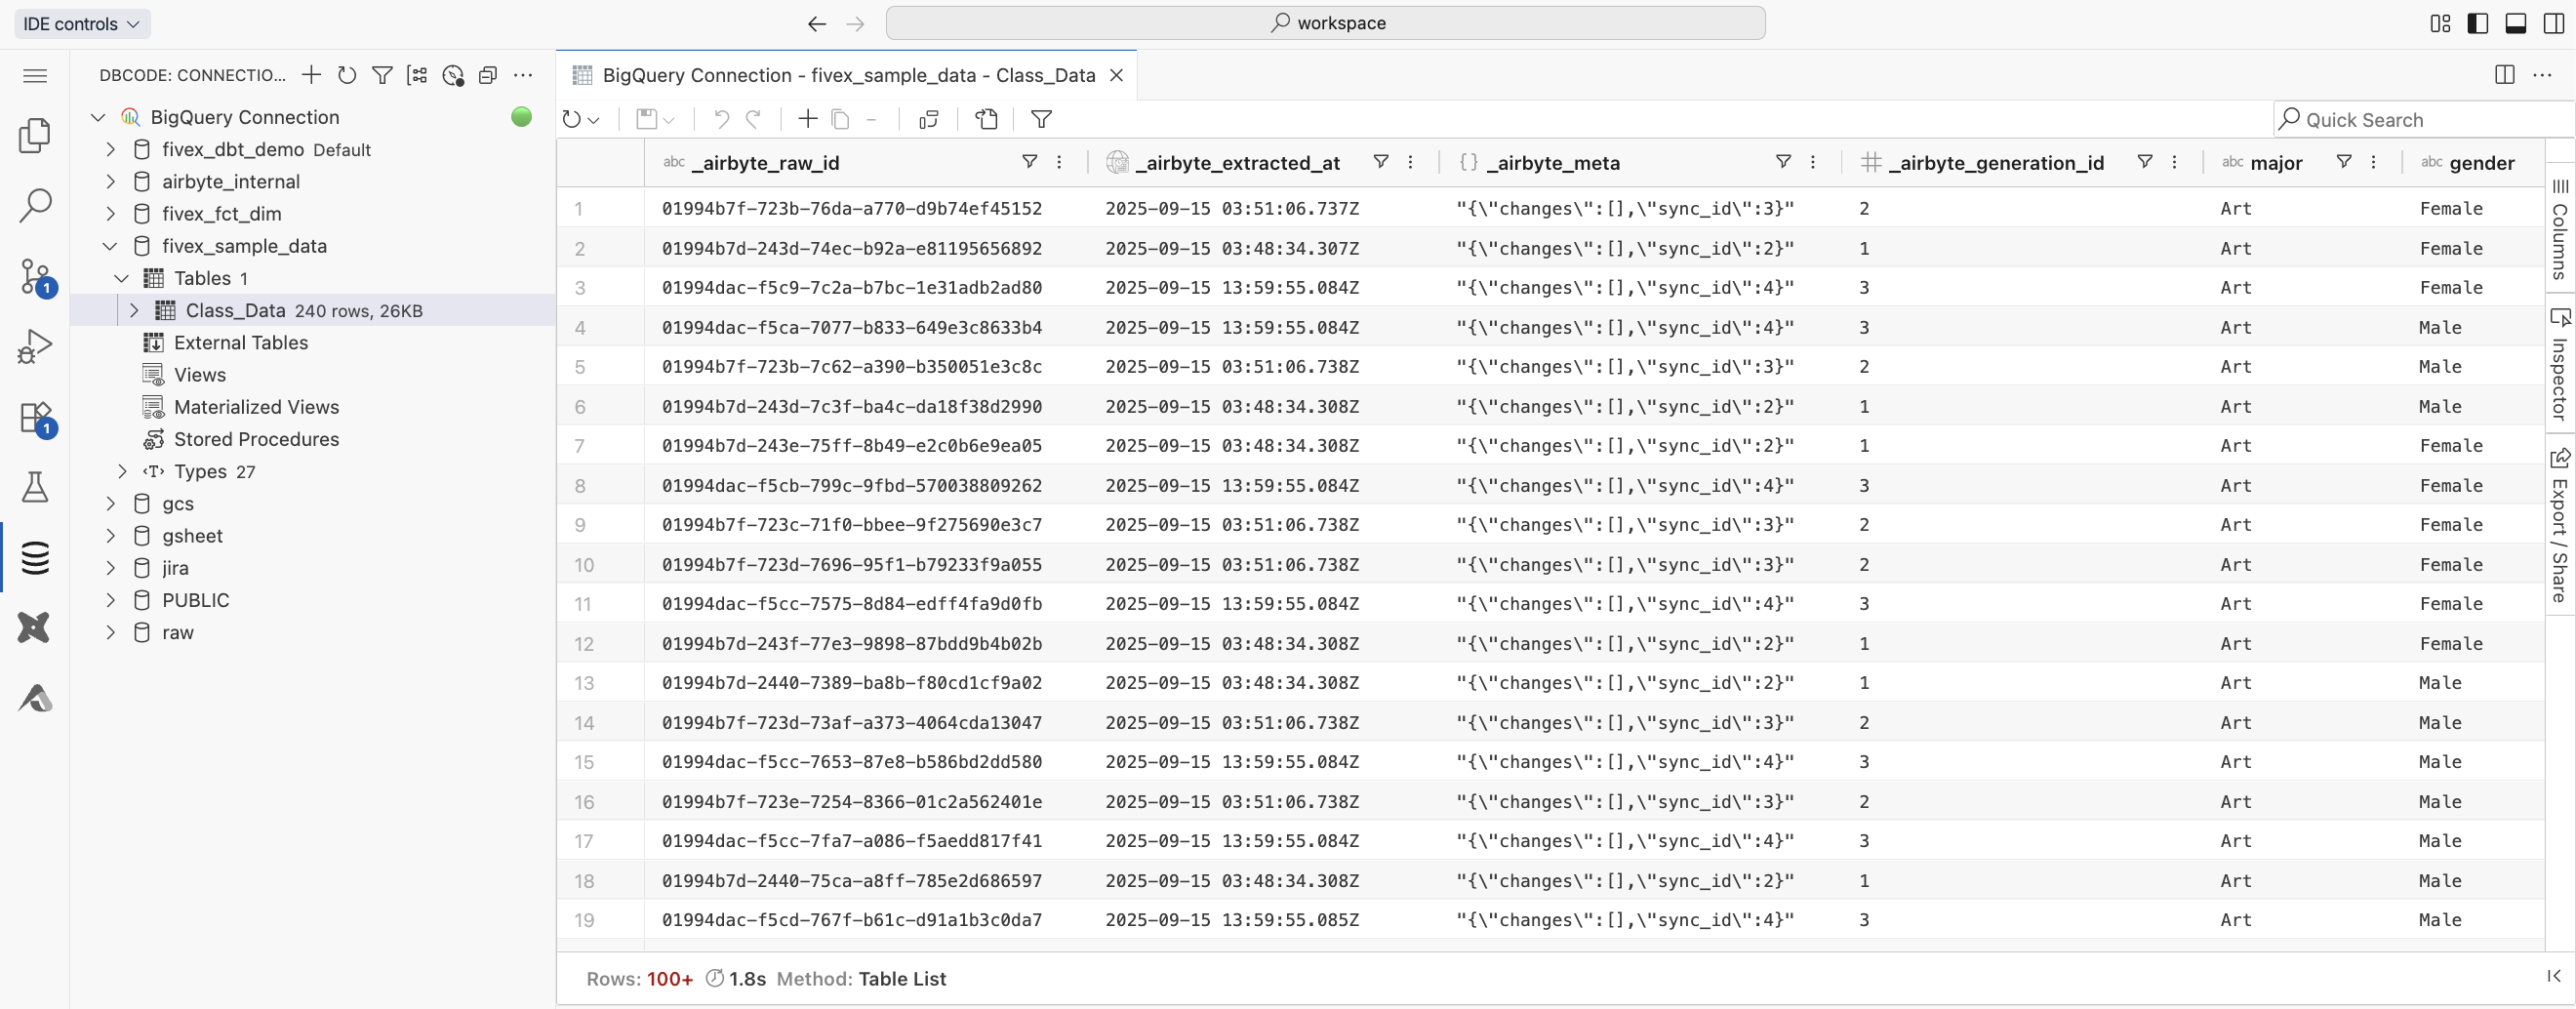
Once you have access to the IDE, you can start exploring your ingested data:1. Browse your data sources
The Database Explorer in the IDE sidebar provides direct access to your data warehouse:- Browse schemas: Expand database nodes to see available schemas and datasets
- Explore tables: Click on table names to view column structures, data types, and metadata
- Preview data: Use the preview functionality to see sample data from your tables
- Execute queries: Right-click on tables to generate SELECT statements
2. Write your first queries
Use the SQL editor to run queries against your data. Here are some useful starter queries: Quick data preview:3. Using the VS Code SQL editor
The IDE provides a full-featured VS Code experience with specialized SQL development capabilities:- SQL editor: Write and execute SQL queries with syntax highlighting and IntelliSense
- Results panel: View query results in an interactive table format with pagination
- Multiple tabs: Work with multiple queries simultaneously using VS Code tabs
- Auto-completion: Get intelligent suggestions for table names, columns, and SQL keywords
- Query execution: Execute queries directly from the editor with keyboard shortcuts
- Export functionality: Download query results in CSV, JSON, or Excel formats
- Query history: Access previously executed queries for reuse
- Use
Ctrl+Enter(Windows/Linux) orCmd+Enter(Mac) to execute queries - Right-click on tables in the Database Explorer to generate SELECT statements
- Use the integrated terminal for advanced SQL operations and dbt commands
Troubleshooting common issues
IDE session won't start
IDE session won't start
Possible causes:
- Browser compatibility issues
- Network connectivity problems
- Platform maintenance
- Try refreshing your browser and starting a new session
- Check your internet connection
- Use a supported browser (Chrome, Firefox, Safari, Edge)
- Contact support if issues persist
Database Explorer shows no data
Database Explorer shows no data
Possible causes:
- Data ingestion may still be in progress
- IDE credentials not configured (for existing warehouse users)
- Schema permissions issues
- Check ingestion status in the Ingestion page
- Configure IDE credentials in Settings → IDE → Credentials
- Verify your warehouse permissions
- Try restarting your IDE session
Query execution errors
Query execution errors
Common issues:
- Syntax errors in SQL queries
- Missing permissions for specific tables
- Warehouse connection timeout
- Review query syntax carefully
- Check error messages for specific guidance
- Use the Database Explorer to verify table names and schemas
- Try restarting your IDE session if connections seem stale
IDE performance issues
IDE performance issues
Common issues:
- Slow response times
- High memory usage
- Session timeouts
- Close unused files and tabs
- Restart your IDE session using the controls in the top-left
- Limit large query results using LIMIT clauses
- Clear browser cache if issues persist
What’s next?
Great! You’ve successfully explored your ingested data. Now you’re ready to transform it into analysis-ready datasets:Invite Your Team
Add teammates and set up permissions for collaborative data work
Explore What's Next
Discover advanced features when you’re ready to go deeper
Continue to Step 7
Next: Invite your teamAdd teammates to your workspace and set up collaboration for your data projects.