Publishing workflow
Access the publish dialog
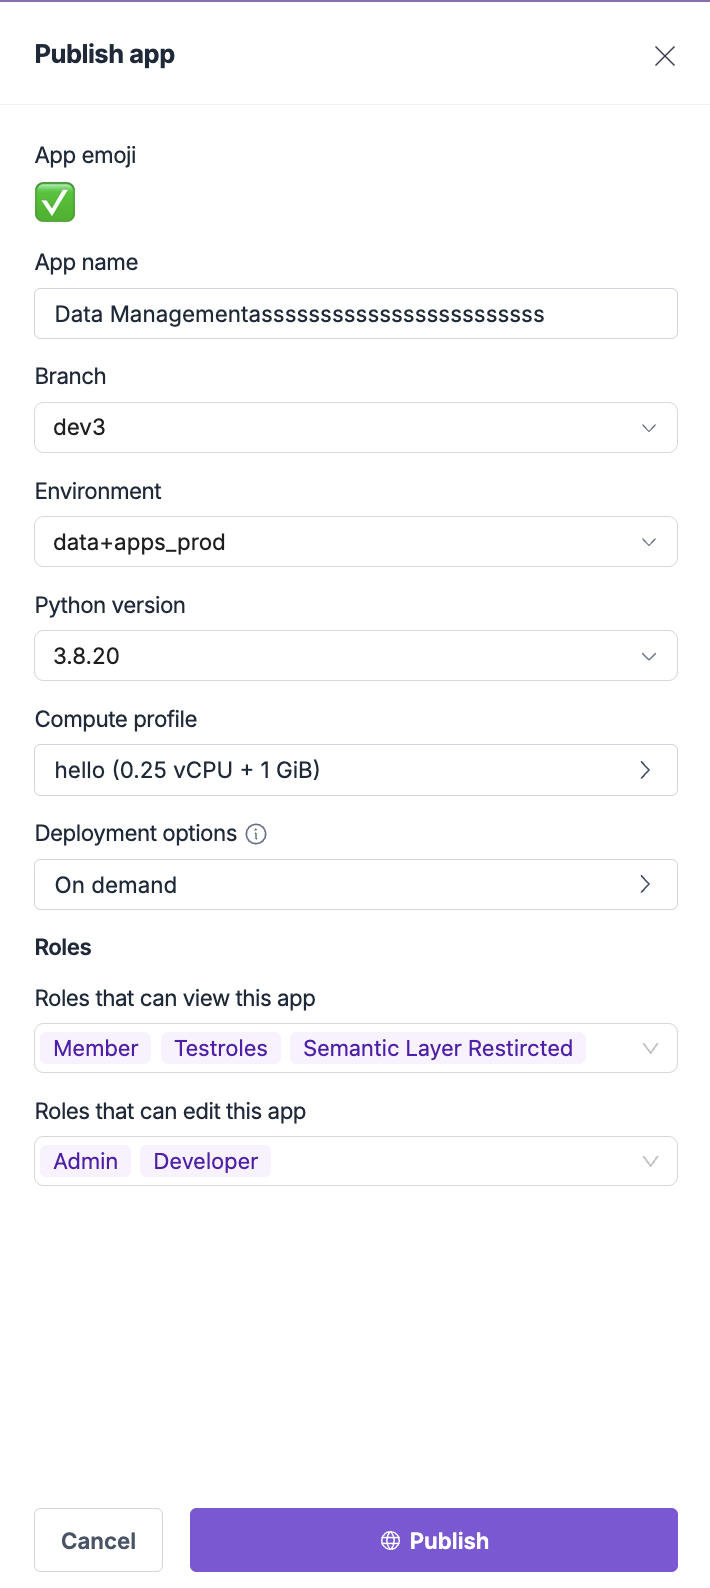
To publish your app, navigate to the Manage Apps section and click the three-dots menu next to your application, then select Publish:
App configuration
Basic app settings
Configure the essential settings for your published application: App emoji:- Select an emoji that represents your application
- This appears in the navigation and app listings
- Choose something that users will easily recognize
- Enter the display name for your application
- This is what users will see in the navigation
- Use clear, descriptive names that indicate the app’s purpose
- Select which Git branch to deploy from
- Typically
mainormasterfor production deployments - You can use different branches for different environments
Technical configuration
Python version:- Select the Python version for your application
- Choose based on your app’s requirements and dependencies
- Common options include Python 3.8, 3.9, 3.10, and 3.11
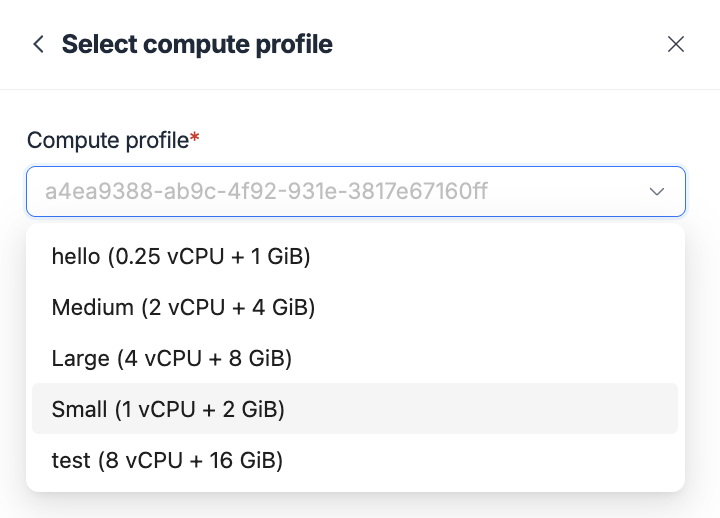
- Configure the compute resources for your application
- Options range from basic (0.25 vCPU + 1 GiB) to high-performance configurations
- Choose based on your app’s computational needs and expected usage
- Custom profiles: Create and manage custom compute profiles from Settings → Compute Profiles in the platform
Deployment options
Understanding deployment types
Choose the deployment option that best fits your use case: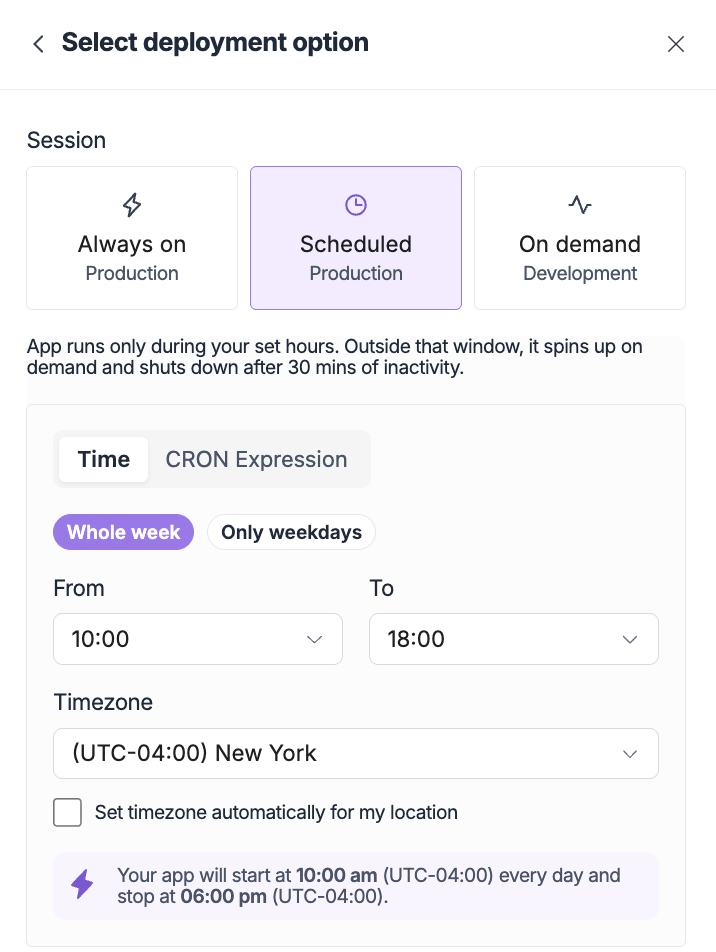
- On-demand
- Always-on
- Scheduled
Best for: Development, testing, and low-frequency usageCharacteristics:
- App starts up when a user tries to access it
- Typically takes about 30 seconds to start
- Automatically shuts down after 30 minutes of inactivity
- Cost-effective for applications with sporadic usage
- Development and testing environments
- Internal tools with occasional usage
- Prototype applications
- Applications with unpredictable usage patterns
Access control and permissions
Role-based access control
Configure who can access your application using role-based permissions: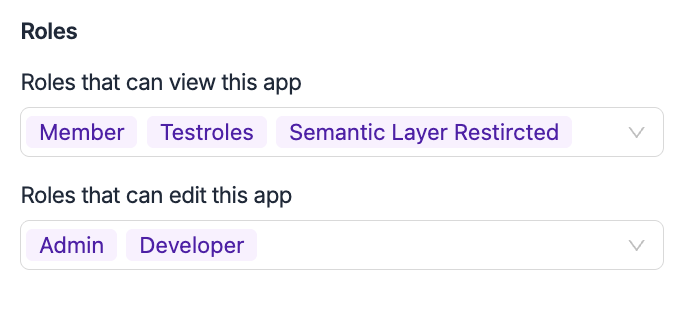
Permission best practices
Principle of least privilege
Minimal accessGrant only the minimum permissions necessary for users to perform their tasks.
Regular reviews
Access auditsRegularly review and update access permissions as roles change.
Clear documentation
Permission trackingDocument who has access to what and why for compliance purposes.
Testing access
Verify permissionsTest access controls to ensure they work as expected.
Publishing process
Step-by-step publishing
1
Configure app settings
Set your app name, emoji, branch, and environment
2
Select compute profile
Choose appropriate compute resources for your application
3
Choose deployment option
Select on-demand, always-on, or scheduled deployment
4
Configure access control
Set up view and edit permissions for different user roles
5
Review and publish
Review all settings and click Publish to deploy your application
Post-publishing
After publishing, your application will:- Appear in navigation - Users with view permissions will see the app in their left navigation
- Be accessible - The app will be available based on your deployment configuration
- Show in Manage Apps - You can monitor and manage the app from the Manage Apps interface
- Display status - The app status will show as “Published” in the apps list
Managing published apps
App status management
Published apps:- Visible to users with appropriate permissions
- Accessible based on deployment configuration
- Can be managed through the Manage Apps interface
- Not visible to regular users
- Still accessible to Admin users and users with Global edit access
- Can be republished at any time
Edit app details
You can modify app settings after publishing by clicking Edit details from the three-dots menu. This opens the same configuration dialog as publishing, allowing you to:- Update app settings and configuration
- Change deployment options
- Modify access permissions
- Update compute profiles
Unpublishing apps
To unpublish an app:- Go to the Manage Apps interface
- Click the three-dots menu next to your app
- Select Unpublish (this option appears for published apps)
- Confirm the unpublishing action
Troubleshooting
Common publishing issues
Publishing failures
Publishing failures
Issue: App fails to publishSolutions:
- Check that all required fields are filled out
- Verify the selected branch exists and contains valid code
- Ensure compute profile is appropriate for your app
- Check for any configuration errors or conflicts
Deployment delays
Deployment delays
Issue: App takes too long to startSolutions:
- Consider upgrading to a higher compute profile
- Optimize your app’s startup time and dependencies
- Use always-on deployment for frequently accessed apps
- Review and optimize your requirements.txt
Access issues
Access issues
Issue: Users cannot access the published appSolutions:
- Verify user roles and permissions are correctly configured
- Check that users have the appropriate view permissions
- Ensure the app is published and not unpublished
- Verify deployment configuration is correct